Back to all projects
Build a True 6-Inch Rolling Gap Storage Cart DIY project
Pinterest-ready project guide
Build a True 6-Inch Rolling Gap Storage Cart
Seasonal note: Year-round DIY project

Build a True 6-Inch Rolling Gap Storage Cart

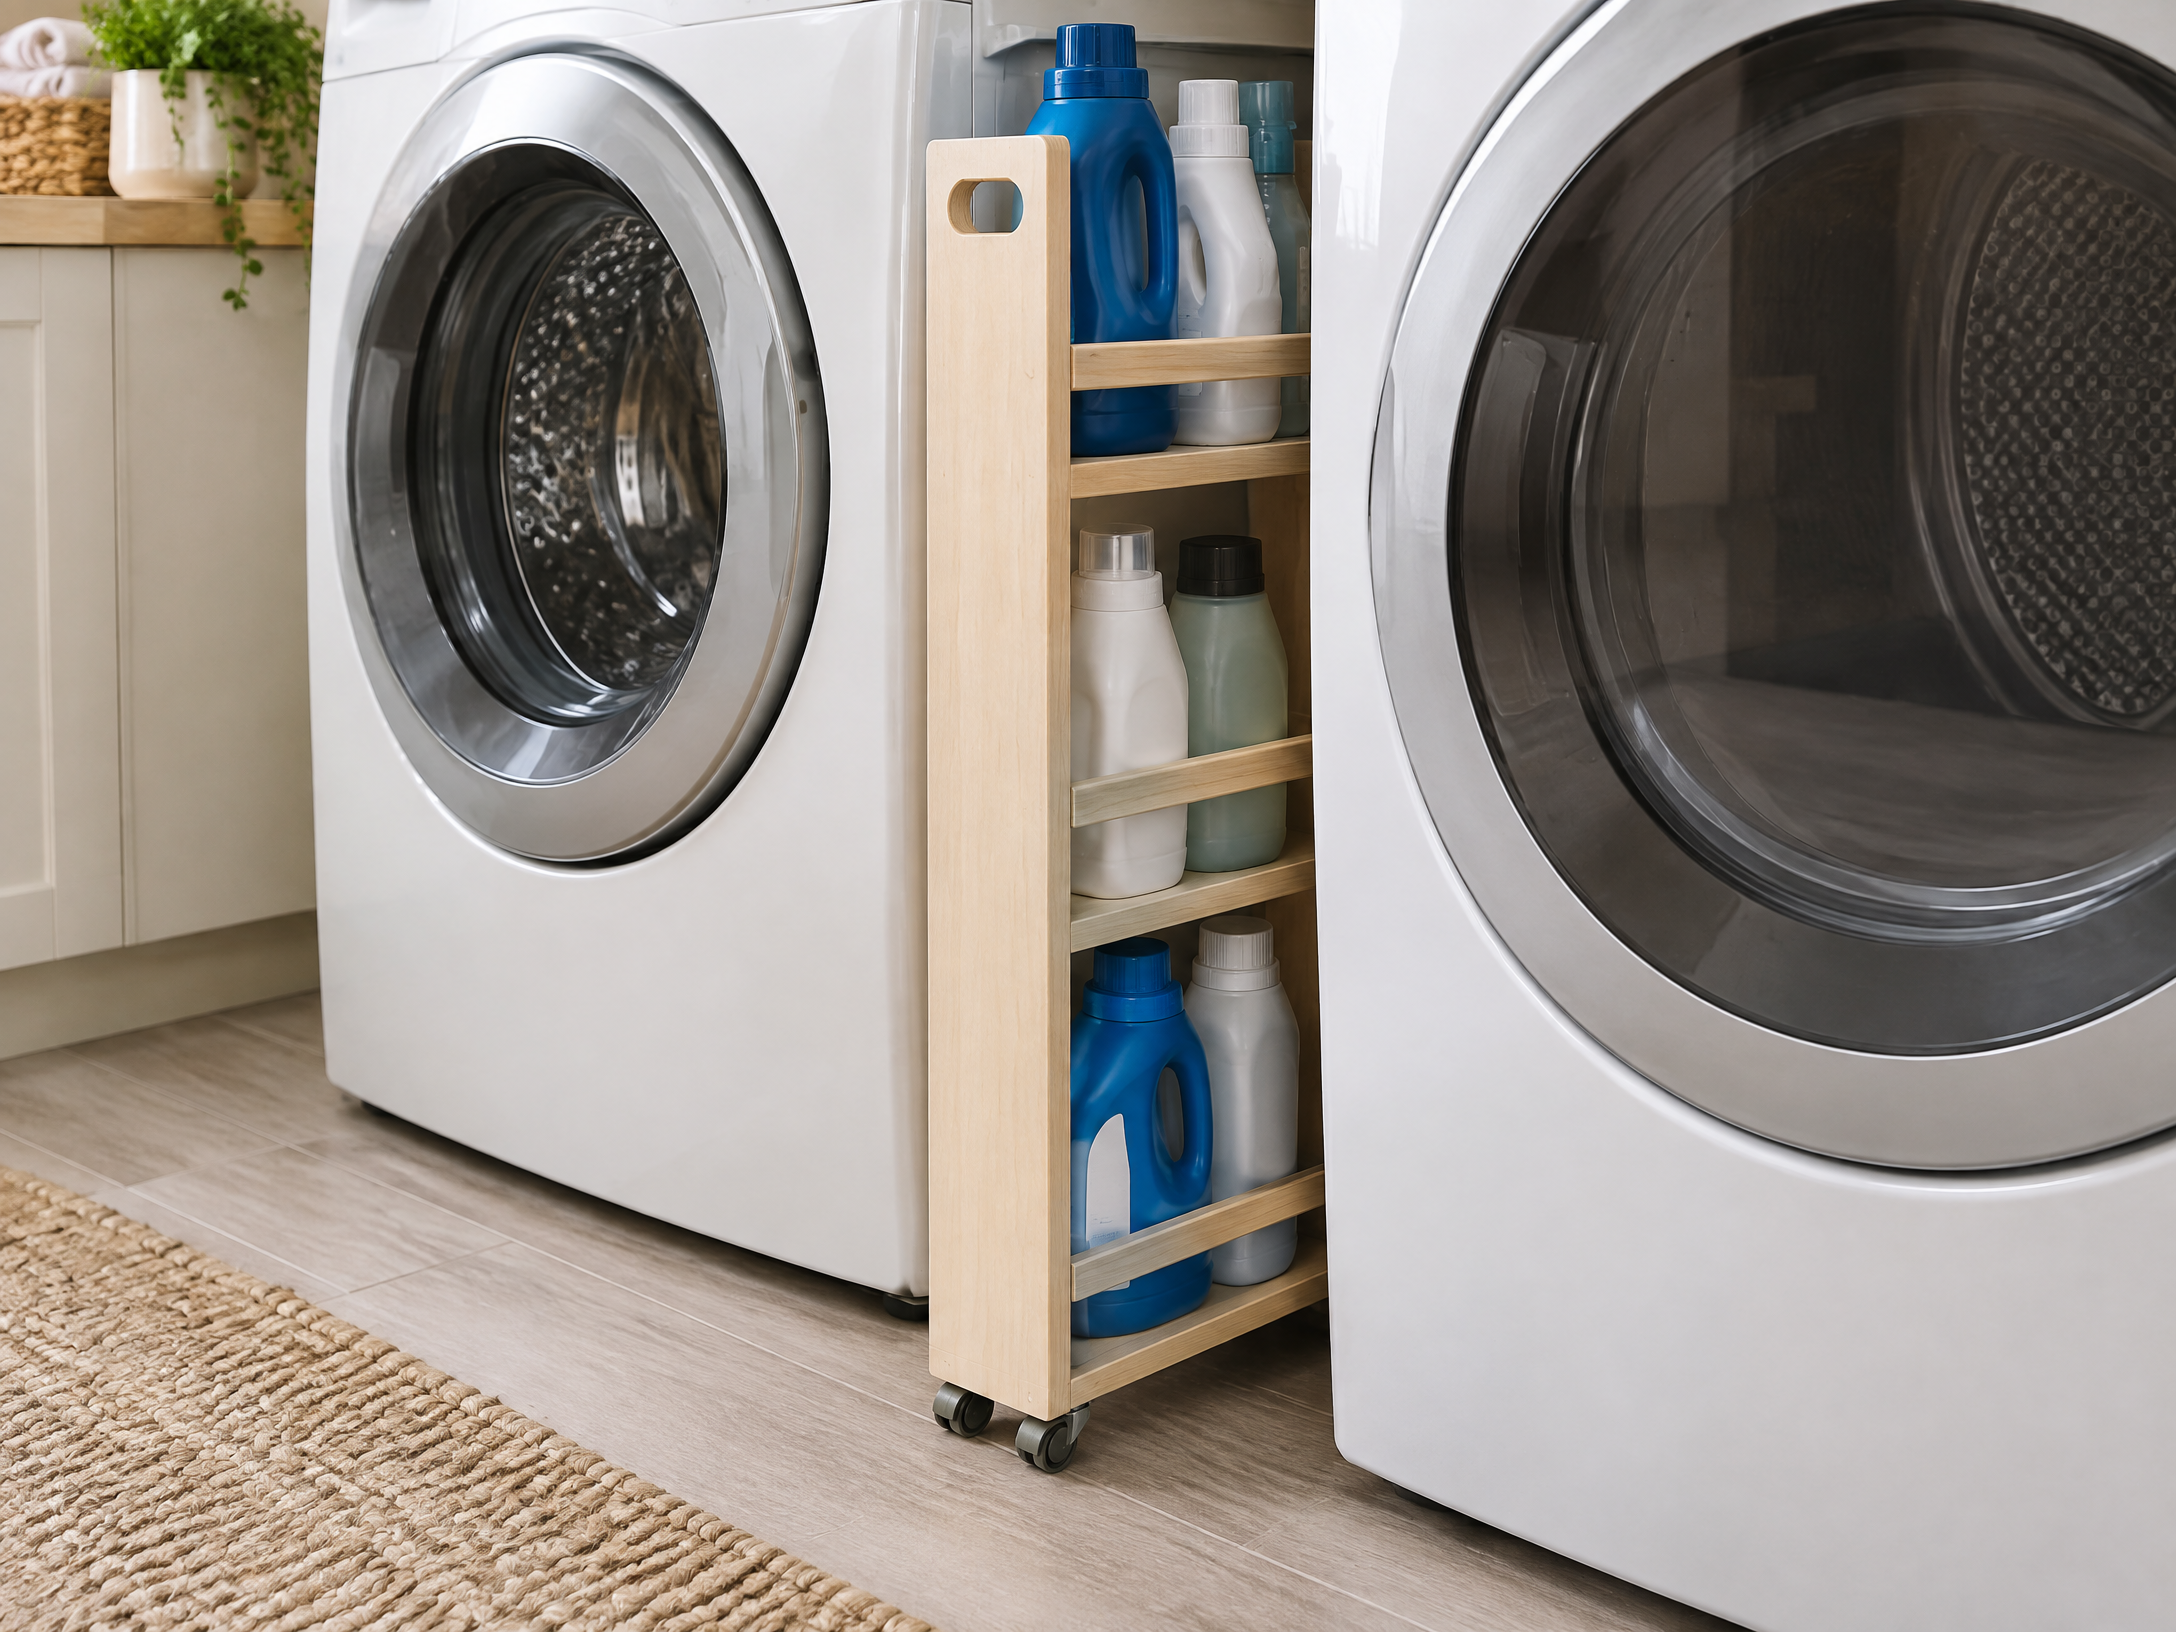
Build a true six-inch rolling gap cart for the narrow space beside a cabinet or appliance. The key is measuring the smallest gap, keeping the frame square, and choosing casters and shelves that will not rub when the cart is loaded.

By The DIY Haven Editorial Team · Last reviewed September 11, 2026 · Reviewed for clarity, safety, and source quality.

$45–$85Estimated cost
7Steps
8Shopping items
Shop starter supplies
Share this guide
Choose the right approach

Best for

A straight, accessible gap with enough depth for a narrow cart and a solid surface or stop to keep the unit from drifting.

Not for

Gaps containing appliance ventilation, hot surfaces, plumbing access, door swings, or a floor that slopes enough to make the cart unstable.

Troubleshooting before you start

Common mistakes

  • Sizing the cart to the nominal gap instead of the smallest measured gap.
  • Forgetting caster and handle clearance at the floor and top.
  • Making shelves too deep for the hand opening.
  • Using tiny casters that bind under the loaded cart.
  • Skipping a stop or pull handle, allowing the cart to tip when extended.
Know the limit

When to stop and call a pro

Stop if the gap is part of an appliance ventilation path, conceals a gas line, or requires moving plumbing or electrical wiring. Do not block manufacturer-required clearances.

Workshop plan

Step-by-step instructions

Save this page for the workshop
1

Measure the gap at floor, middle, and top

Measure the gap at the top, middle, and bottom with appliances in their final position. Use the smallest measurement and leave a small running clearance on each side.

2

Plan the cart width, depth, and load

Check baseboard, door swing, outlet, hose, and ventilation obstructions. Decide whether the cart needs shelves, a vertical bottle bay, or a single pull-out basket.

3

Cut and square the frame

Calculate the carcass width after subtracting panel thickness, edge banding, caster height, and handle clearance. Cut a test spacer from scrap before buying materials.

4

Install shelves and a pull handle

Assemble the narrow panels and shelves on a flat surface, keeping the carcass square. Seal exposed plywood edges before the cart is loaded.

5

Fit low-profile casters

Install four low-profile casters with the swivel direction planned for the pull-out path. Add a top pull that does not catch on the appliance.

6

Test the cart empty and loaded

Roll the empty cart in and out slowly, checking that it clears cords, baseboards, and door trim. Add a rear stop or tether only if it does not interfere with appliance service.

7

Step 7

Load heavy bottles low, label shelf weight limits, and retest the cart fully extended. Never block a required appliance vent or disconnect access.

Safety check

Wear eye and hearing protection when cutting panels. Confirm the cart will not cover appliance ventilation, shutoff valves, cords, or service panels. Keep the center of gravity low to reduce tip risk.
Helpful answers

Frequently Asked Questions

Measure the narrowest gap and subtract the planned running clearance on both sides, then account for the cart’s actual panel thickness and any edge treatment.
Community notes

Ratings & Reviews

—

Be the first to review

Share your workshop experience

Real notes from DIY Haven readers.

No reviews yet. Your workshop notes can help the next maker.

Was this guide helpful?

Your anonymous feedback helps us improve future project instructions.

Keep building

More ideas selected for this room, skill level, and project style.

Ready to make it yours?

Pin this guide, save it for later, and take the checklist into your workshop.